Best practices for securing your Intercom workspace
When running an online business, you have to be very aware of the wide variety of threats you face, where your vulnerabilities lie, and how to protect yourself from those risks.
Essentially, this is your “threat model”. What assets do you have and who wants them? If you’re online, so is your data and your customers’ data, which must be protected. Going further than that, your customers have to trust you with that data. No matter the size of your business, there are countless vulnerabilities and threat actors which may expose that data – and if customer trust is lost, it can be very hard to win back.
How do you keep your business secure and also build and maintain the trust of your customers? We are extremely conscious of our own security – and that extends to our obligation to provide a safe and secure tool to our customers.
In this post we’ll talk about how to best secure your Intercom workspace and ensure you keep that data safe. We’ll cover:
- The importance of having strong teammate authentication for your workspace.
- How you should prevent user impersonation and conversation theft in your Messenger.
- How to implement “least privilege” with roles and permissions.
- How to see suspicious activity in your workspace and and how to add a security contact for important security-related communications.
Secure your teammate logins with 2FA, SSO, or SAML
Research shows that shows that 82% of breaches last year were due to what’s known as the “human element” – hackers gaining access by deceiving people rather than finding weaknesses in code. As a result, securing access to your workspace is the most important area to focus on.
By strengthening the access model for your workspace, you reduce the chances of the human element playing a part in any security issues. Have your credentials been in a breach? Do you reuse passwords? Do any of your teammates?
“The attackers could talk to your customers directly, damage your reputation, or send spam under your brand”
If someone gets access to your workspace and customer conversations, that may create privacy issues under applicable law such as GDPR. The attackers could talk to your customers directly, damage your reputation, or send spam under your brand.
While Intercom does support plain login and password, we highly recommend adding extra layers of security to that, either via two-factor authentication, Google SSO, or SAML, if you’re an Enterprise customer. This makes it that much harder for someone who compromises a credential to get access to your entire workspace.
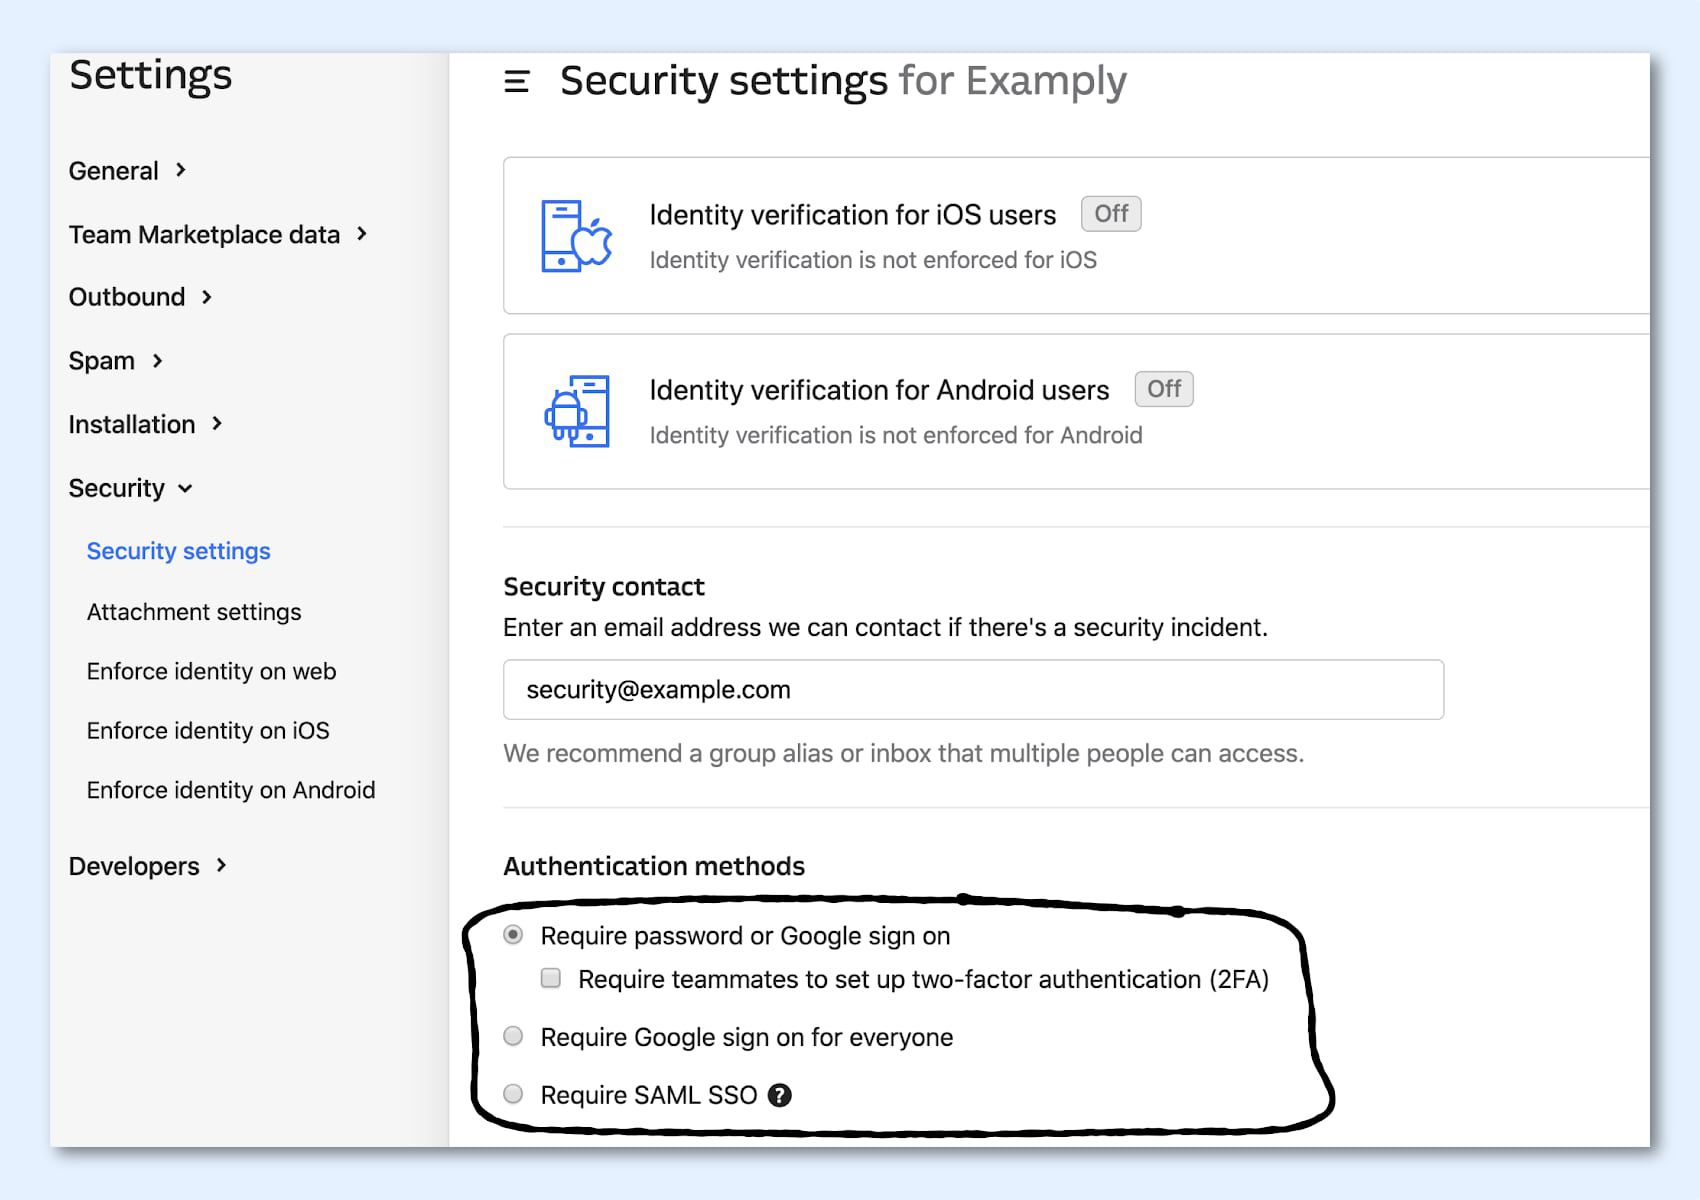
Key takeaway: Strengthen your login security in Settings.
Secure your user conversations with Identity Verification
If you’re using Intercom, you’re likely using our world-class Messenger for chatting with your website visitors and logged-in users.
But if you have a conversation with your user Bob, how can you be sure it’s really Bob and not an impersonator? What if someone is just saying they’re Bob but they’re not actually him? That’s where Identity Verification comes in.
“We strongly recommend enabling Identity Verification to prevent impersonation”
No matter if you’re using Intercom for visitors or users or both, we strongly recommend enabling Identity Verification. Identity Verification allows you to send us a unique identity token for each of your users, meaning you’re able to know with certainty which Bob is the real Bob.
Even if you don’t have any users on your workspace, we’d still recommend you enforce Identity Verification as it will prevent any malicious creation of users in your workspace. Enabling it won’t impact your website visitors as anyone who starts a conversation will be identified by a unique cookie in their browser. Furthermore, you should also enable Identity Verification for your iOS and/or Android apps.
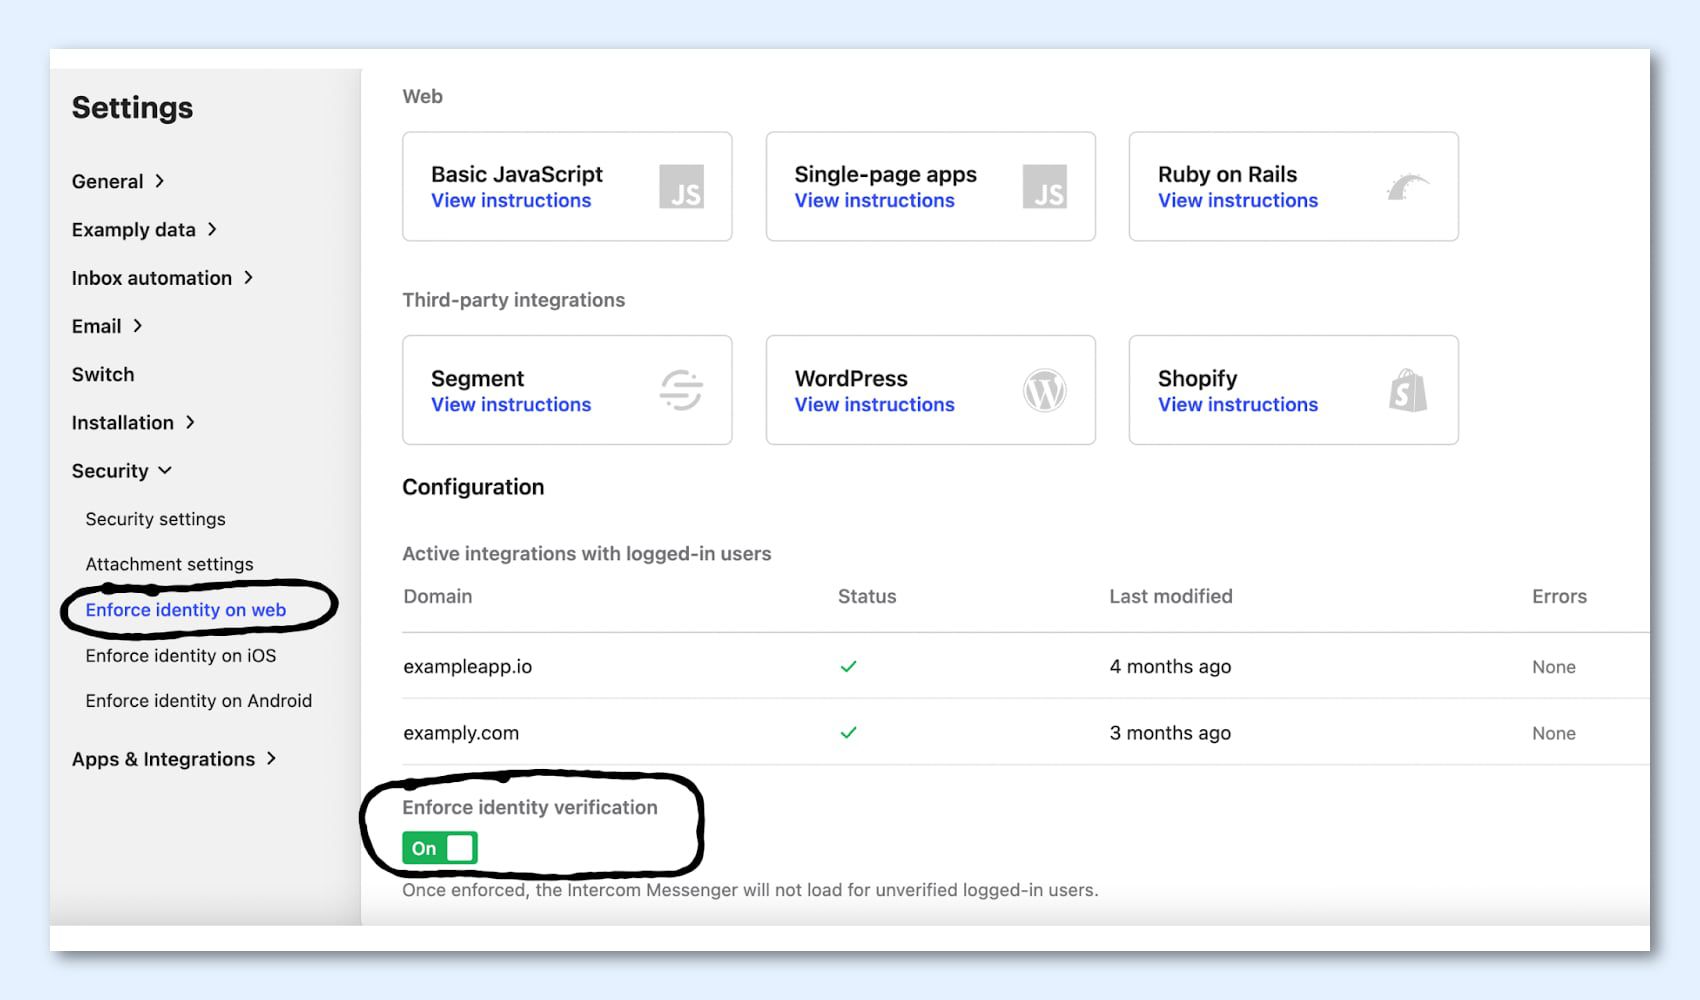
Key takeaway: Set up and enforce Identity Verification for your workspace in Settings.
Use Roles and Permissions to implement “least privilege”
You can control what actions your teammates can take via Permissions and Roles. This can be really powerful to limit certain privileged actions to only a small number of teammates in your workspace – this approach is also known as “least privilege”.
In practice, it means you’re only giving your teammates the powers they need to do their job and in doing so you limit the blast radius of any potential account takeover incident.
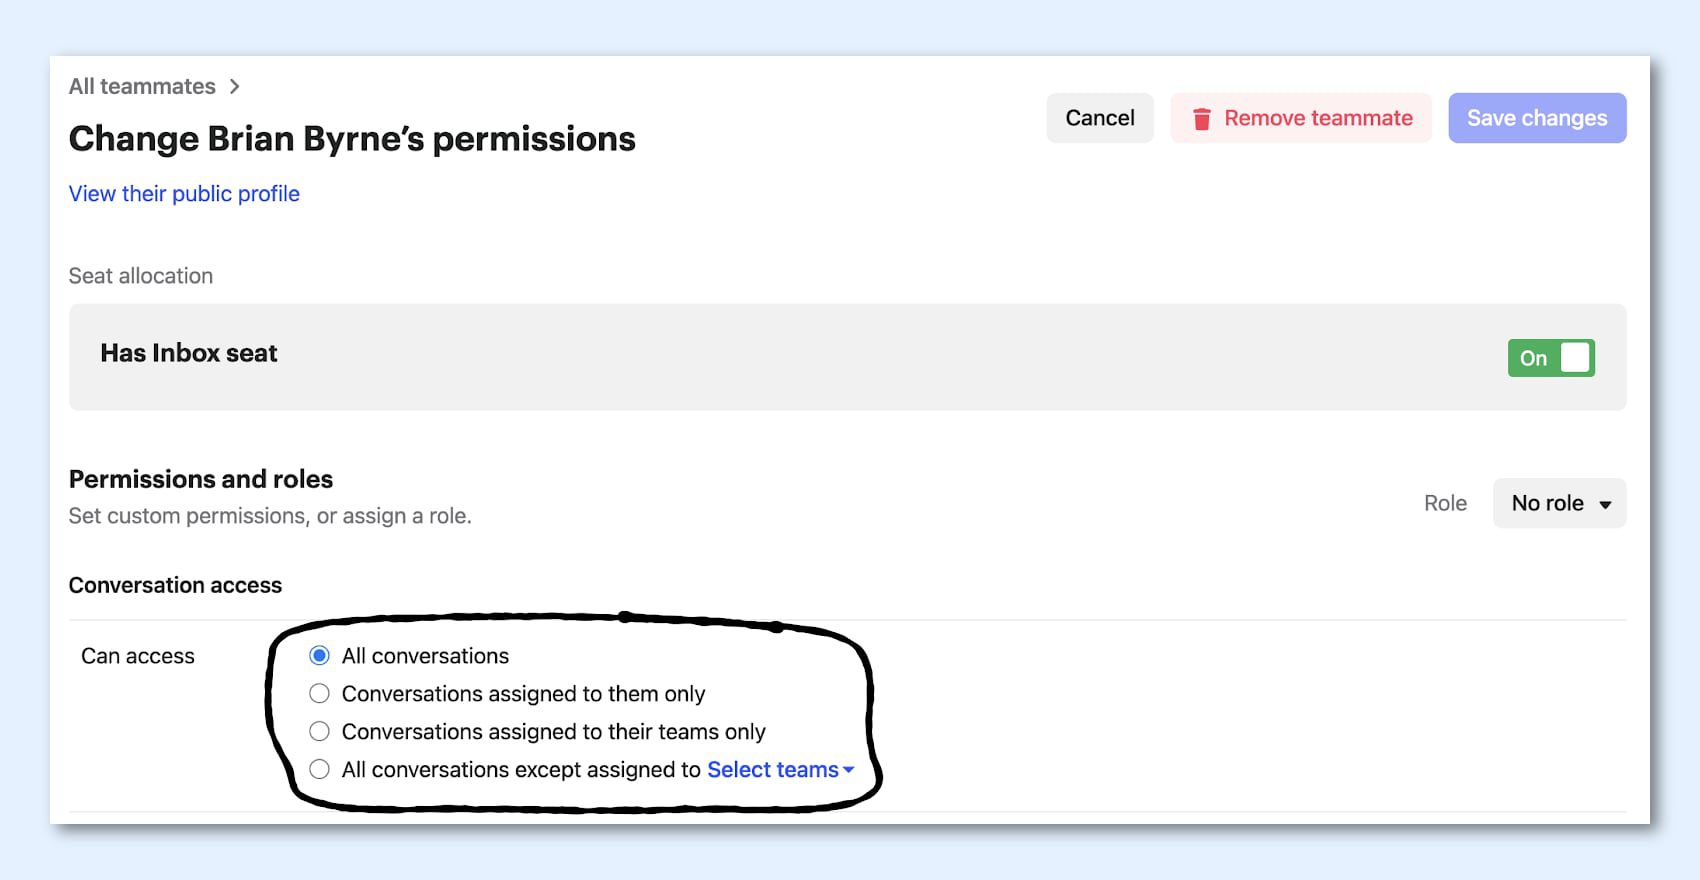
Key takeaway: Set up Roles in your workspace now.
Seeing what’s going on inside your workspace
Even after you have roles, it’s still good to periodically check your Teammate Activity Logs for suspicious activity.
“It’s important to see whose logins are failing, who’s being invited, settings being changed, or maybe a bulk export of all your data”
If you have a lot of teammates, it’s important to see whose logins are failing, who’s being invited, settings being changed, or maybe a bulk export of all your data. These insights are a valuable way of detecting any suspicious behavior and guard against the small but dangerous risk of internal bad actors.

Key takeaway: Check your Teammate Activity Logs in Settings.
Vigilance is forever
The best advice we can give is to remain vigilant. The battle is never over. You can’t “achieve” security. Stay humble, be prepared, and don’t rest on your laurels!
If we ever need to get in touch with you about a security issue, we’ll use the Security contact in your workspace. You can set one in your Security settings.
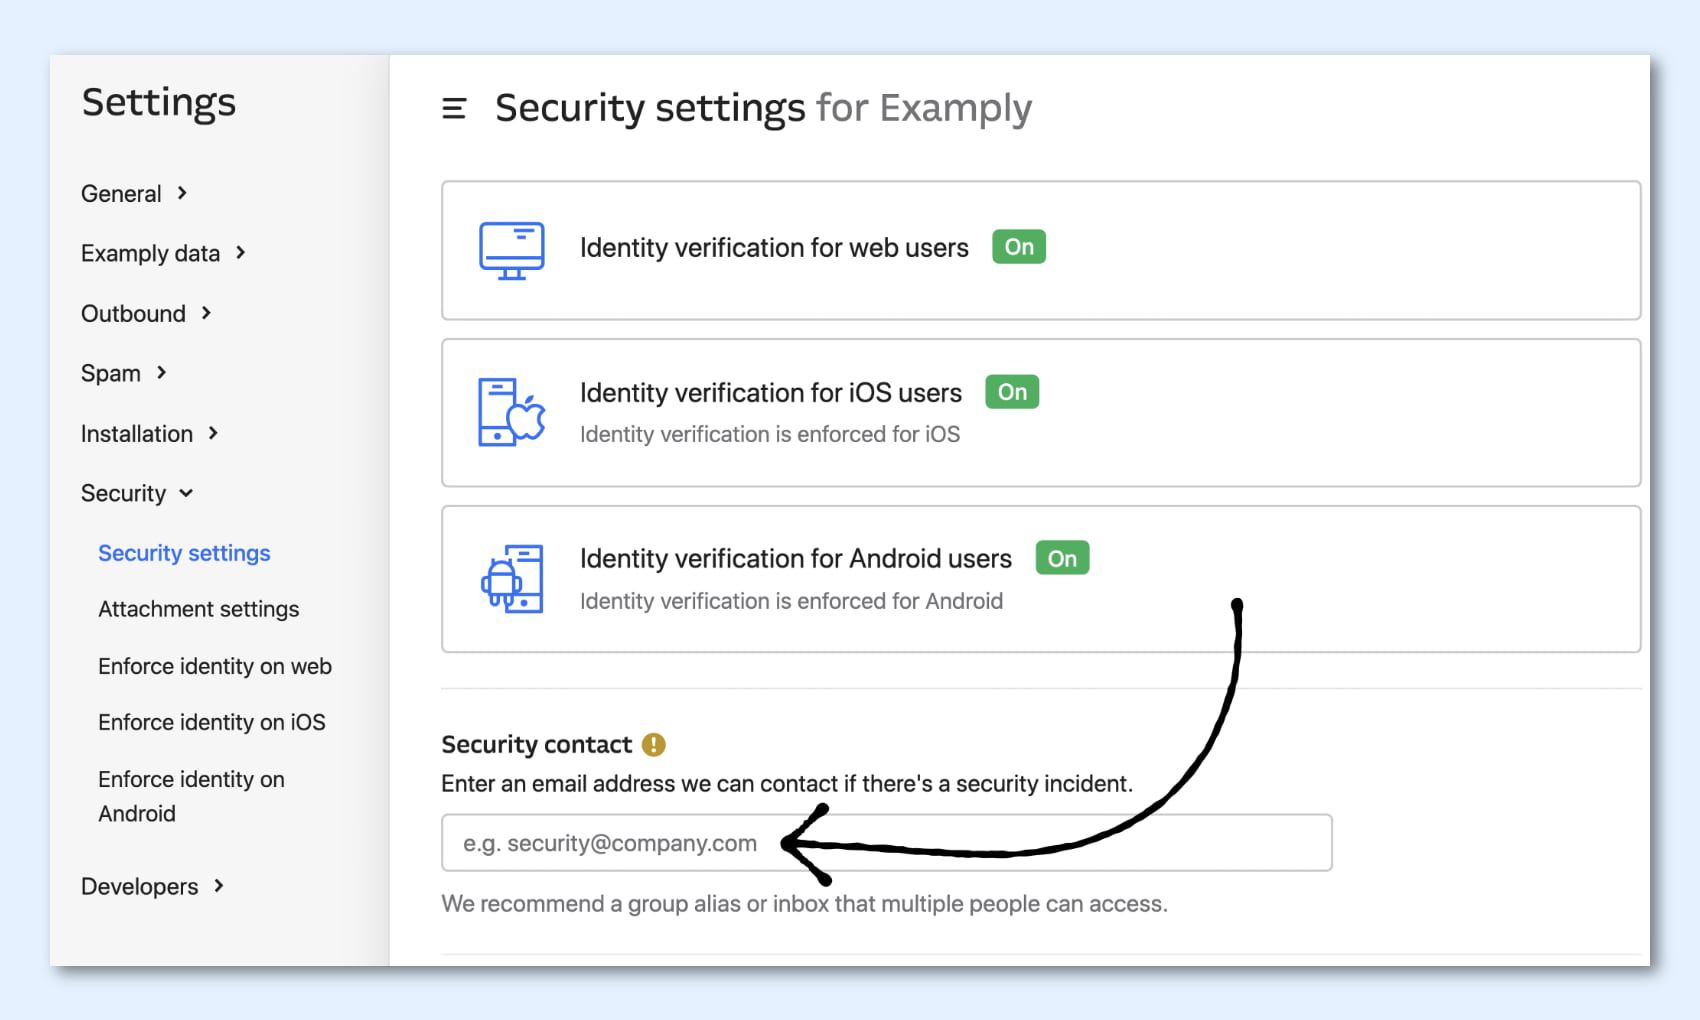
It doesn’t need to be a teammate on your workspace, it could be your security alias – for instance, ours is security@intercom.com, which you can use if you need to report an issue to us! 🙂


